Winter on Shoreham Beach, West Sussex. Landscape Photography Slawek Staszczuk.

Seascape from idea to postproduction

Case study: a seascape from idea to postproduction

Everyone has a preferred way of learning. If you like learning by example and analysis of others’ work, and you feel you can improve your seascapes, then read on. As I shall explain in detail how I created the above photo from idea to postproduction. Including all the equipment I used, camera settings and software parameters, as well as explanations why I used them. Since I took this picture a few weeks ago, all of the information is still quite fresh in my memory.

The Idea

The clouds looked quite interesting on that early December afternoon, promising a good sunset. So I decided to give it a go and get some photography done. I took a short drive to Shoreham-by-Sea with three potential spots in my sights. One, the boats moored on river Adur. The second option was the oft photographed iconic view of the town seen across the river. And the third possibility was the beach. With any luck, I thought to myself, I might get some material from more than just one spot.

DWINDLING OPTIONS

Whilst driving, I saw that the tide was really high on the river, and there was no way I could do what I had in mind at this location. Hence I didn’t even think of stopping there, and drove on to the next two spots.

Next, I tried the town view. But it quickly became apparent that the clouds were thickening a bit too quickly, and I wouldn’t get the effect I was hoping for. Also, a new development was taking place on the river bank, and it was already blocking much of the church and spoiling the view, which has been the town’s calling card. Some great urban planning…

Shoreham by Sea in winter.

Shoreham-by-Sea – town view
The clouds were thickening too fast for my liking, and soon blocked the sun for good. This, coupled with the the ugly construction obscuring the church, made waiting here for sunset a waste of time. So I walked to the beach, to take my “last stand” that evening.

As a result, I headed for the beach, which at this point seemed to be the only viable option. The coast in Sussex is quite tame for the most part, except for cliffs in a few places. And sadly, these are far away from Shoreham. I knew then that I’d have to work with some man-made structures as foreground; or maybe go for a minimalistic approach, without any obvious focal point. The beach affords a range of sea defences, piles of boulders interspersed with wooden groynes. And I decided to focus on these features.

ON THE BEACH

First, I took a snap of a wooden groyne, and quickly realised it wasn’t going to work. Because there was no direct lighting, the image lacked impact. (With more decided sunlight, I might have been able to work with long shadows cast by the groyne.) I promptly moved to the nearest pile of rocks. Luckily, these offered much more room for manoeuvre.

Winter on Shoreham Beach.

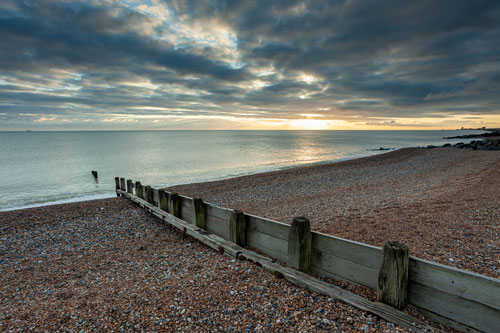
Groyne on Shoreham beach
I felt the groyne didn’t really work well enough as foreground in these conditions. Still, I took a “test snap” to check if there was anything to be had that I wasn’t seeing. But it only confirmed my impressions.
In the distance you can see the boulders that I moved to a couple of minutes later.

The westering sun gave the boulders a sheen, which caught my eye. I really wanted to make it prominent in the image. At the same time, I also wanted to include as broad a stretch of the sky as possible in the frame – since the clouds were quite interesting, although not exceptionally colourful. Besides, after a few quick snaps, I decided to “dissolve” the sea and get the clouds to streak on long exposure. All of these wants dictated my choice of perspective, focal length, and exposure time…

Shoreham Beach West Sussex

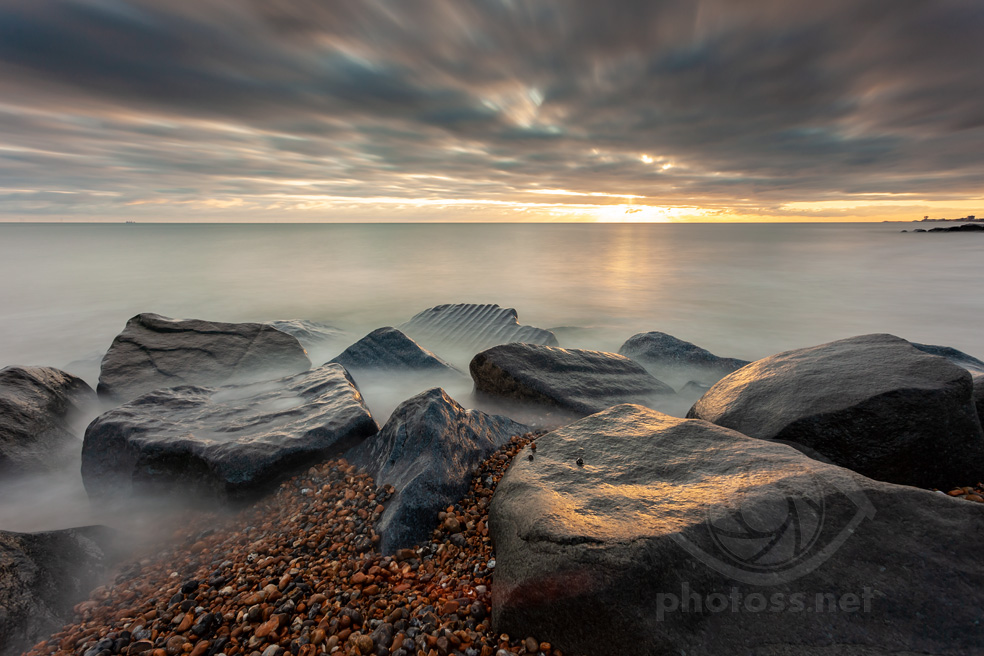
Boulders on Shoreham beach
The rocks turned out to be a much more graceful subject on this occasion, as this first test shot quickly confirmed. After a few tweaks to the composition and exposure, I arrived at the image you saw at the top of the page.

Technicalities & Practicalities

FOCAL LENGTH AND PERSPECTIVE

To encompass the largest possible stretch of the sky in the frame I chose the widest angle I had at my disposal, at 17mm. Then I got much closer to the boulders, to fill the breadth of the frame with them, and to make them appear really close to the viewer, and their details more palpable. Next, I adjusted the tripod to a height from which the reflections on the boulders appeared strongest when seen through the view finder.

FILTERS

Since there was still a lot of ambient light, I used a flat neutral density filter (10-stop strong), as I needed to slow down the shutter speed. In order to create that ethereal effect on the moving water, and the smudging in the clouds. Because there was a lot of contrast between the sky and the rest of the frame, since I was looking straight into the sun, I also used a graduated ND filter. Namely, a reverse hard-edged 0.9 ND grad (3-stop strong). Which is darkest near the centre and slowly tapers off towards the upper edge, and is designed specifically for capturing sunsets. (Both filters from Breakthrough.)

CAMERA SETTINGS

These two filters gave me a 30 seconds exposure, at f/8 and ISO250, which was just enough to create the effect I was after. By the way, I could have switched to Bulb and taken a longer exposure at a lower ISO, and perhaps at a smaller aperture. But I intentionally chose not to, because the warm glow on the boulders was evidently very ephemeral, and I was determined to capture it. The light was quickly shifting and a couple of minutes later a thick layer of bluish clouds covered the sun, never to reveal it again on that evening. Seeing what was inevitably about to happen, I preferred to take a few slightly different shorter exposures while the warm reflections were dancing on the boulders, and to be able to do any necessary tweaking in between. Rather than taking one longer exposure, with no opportunity to correct it.

FURTHER SNAPPING

Eventually, the first “proper” long exposure (after a few less interesting shots without the 10-stop filter) I took turned out to be the most effective, and didn’t need any tweaking. I took three more from slightly different angles, and then the glow was gone. Nevertheless, I kept shooting for about an hour afterwards. Even though there was no red sunset or afterglow, and everything turned blue very quickly, the constantly shifting light created interesting opportunities for a long time. Soon it was getting darker, and I no longer needed the 10-stop filter to slow down the shutter speed. Also, because some heavy clouds were blocking the brightest part of the sky around the sun, I swapped the reverse filter for a regular hard-edged .6 grad (2-stop strong), and used it for the rest of the session.

Equipment and settings laundry list

  • Camera: Canon 5DII
  • Lens: Canon 17-40mm @17mm
  • Tripod: Manfrotto 190
  • Filters: 10-stop ND + 3-stop reverse ND grad, from Breakthrough
  • Shooting mode: Aperture priority (compensation +1 stop)
  • Aperture: f/8
  • Shutter speed: 30s
  • ISO: 250
  • Metering: Evaluative
  • Focusing: Single shot
  • Auto-Focus points: 1 in the centre
  • Image quality: RAW
  • White Balance: Daylight
  • Back button focusing

(read about my recommended settings for landscape in general here)

WIND FROM THE LAND

There was a healthy breeze all through the evening, but luckily, and quite unusually, it was coming from the land. Which was welcome news for me for two reasons. First, on a strictly practical level, I didn’t have to cope with sea spray settling on the filters, or on the lens. When the wind is blowing from the sea, you can easily spend most of the time trying to wipe the droplets off the filter. And what a Sisyphean task it is… even if you manage to get rid of the water, you invariably end up besmearing the filter with salt residue. Which is hard to get rid of, until you give the filter a wash with fresh water.

Second, it was also favourable on an aesthetic level, since the wind was blowing roughly towards the sun. Thus it was pushing the clouds in that direction. Which in turn allowed me to create an impression of “acceleration” in my long exposures, with the cloud streaks pointing towards the sun. Clouds smudging sideways across the frame wouldn’t have the same impact.

Seascape from idea to postproduction.

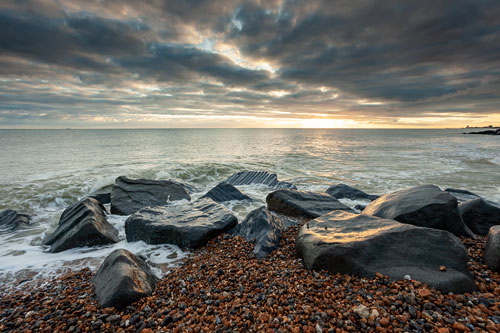
Another long exposure, taken later on the same evening.
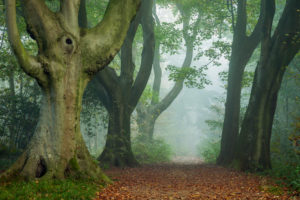
Postproduction

I always prefer to do as much work as possible before I press the shutter release button. In order to do as little as possible later on in editing. I follow the old cliché of “getting it right in the camera”, and don’t rely on software gimmicks to salvage botched exposures, or to create phantasmagorias.

And this image is no exception. All the edits I applied were basic tonal and colour corrections, noise reduction and default sharpening; also automatic lens corrections, including chromatic aberration removal and geometric distortion correction. Plus horizon straightening at the end (not much was needed). All of those operations took about a minute.

Check the before and after comparison:

As you can see, the changes are rather cosmetic. If you want to find out what settings I used specifically, examine the software screenshots.

TONALITY & COLOURS

White Balance. The image was shot on Daylight. I moved the Temperature slider substantially, and the Tint slider slightly, to the right, in order to warm up the image and give it more of a sunset colour palette.

Tonality. I brought Highlights and Whites to negative values to recover some of the detail in the brightest spots. Then I used Clarity and Dehaze at low positive values to increase local contrast and definition. Besides, I slightly raised the overall Contrast.

Colour. I used Vibrance to liven up the colours somewhat. I generally prefer to use this parameter, rather than Saturation, as it is more selective; it doesn’t add the same amount of saturation to each pixel indiscriminately.

DETAILS

Sharpening. I essentially accepted the default settings, apart from Masking. This parameter allows you to limit the area to which sharpening is applied, and therefore can help you avoid needlessly accentuating noise in portions of your image that don’t have any defined detail (like skies).

Noise Reduction. I was only concerned with Luminance and Color, both of which I increased slightly from their default values while checking the effects at 100% (1-1 pixel) view in the noisiest areas of the image. Otherwise I left the sliders at default settings.

LENS CORRECTIONS

Chromatic Aberration. The automatic removal, a one-click affair, did everything that was needed. Which in this case was some green and purple fringing along the  boulder contours in the corners.

Lens distortion. At 17mm, the lens I used has quite a pronounced barrelling distortion. The automatic correction based on the profile for this particular lens did a satisfactory job.

These are all the settings I used, and I didn’t do any further editing in Photoshop or any similar application.
I used ACR (Adobe Camera RAW) plugin for this example, as most readers will likely be familiar with it. But any good RAW processing software today offers identical or analogous tools, and similar effects can be easily achieved in other programs.

I hope you enjoyed this analysis of a seascape from idea to postproduction, and found in it something that you can apply to your own photography.

Read other similar articles in my Landscape Photography is Simple “blog”. Or click on a random post below.

Leave a Comment

Your email address will not be published. Required fields are marked *