INTRO
So, what is the best light for landscape photography?...
At the risk of stating the obvious – the title is somewhat tongue-in-cheek. There’s a myriad of conceivable potential landscape scenes, and even more inconceivable ones. All of which are not served equally well by the same kind of light. And if you were to ask ten competent outdoor photographers what they consider “good light” for landscape, you’d likely get ten different answers. There would be significant overlap between them and some reoccurring themes, but details would vary.
The answer may depend on personal preference and taste, but also on the subject matter, available vantage point(s), available optics, compositional choices (which, in a circular fashion, are often dictated by available lighting), and more.

Spring morning in the Jura Mountains, Switzerland
So, this is necessarily an opinion piece. I’ll try to describe my favourite lighting scenario in possibly abstract and generic terms, but illustrate it with specific examples. And explain why I believe this kind of lighting works well on most landscape scenes, and what makes it effective. I’ll also provide a simple recipe for “the best light for landscape”, aimed at beginners. Naturally, take it with a grain of salt… Lastly, I use “landscape” in a very broad sense here, including cityscapes and natural scenes with architecture and other man-made objects in them.
Light and Lighting
These two words are used abundantly by photographers of all sorts when talking about their craft. We typically treat the two terms loosely and interchangeably, based on our intuitive understanding of them, not adhering to their dictionary definitions. I’m guilty of it myself, but for the purposes of this post, I’d like to clarify what I mean by those words and draw a distinction between them.
LIGHT
The physics definition of light (or “visible light”) is: electromagnetic radiation that is visible, perceivable by the normal human eye as colours between red and violet [the latter part of the definition describes the exact frequencies of visible light, which are of no interest to us in this context]. Light thus understood can come from a variety of sources that either emit it or reflect it.
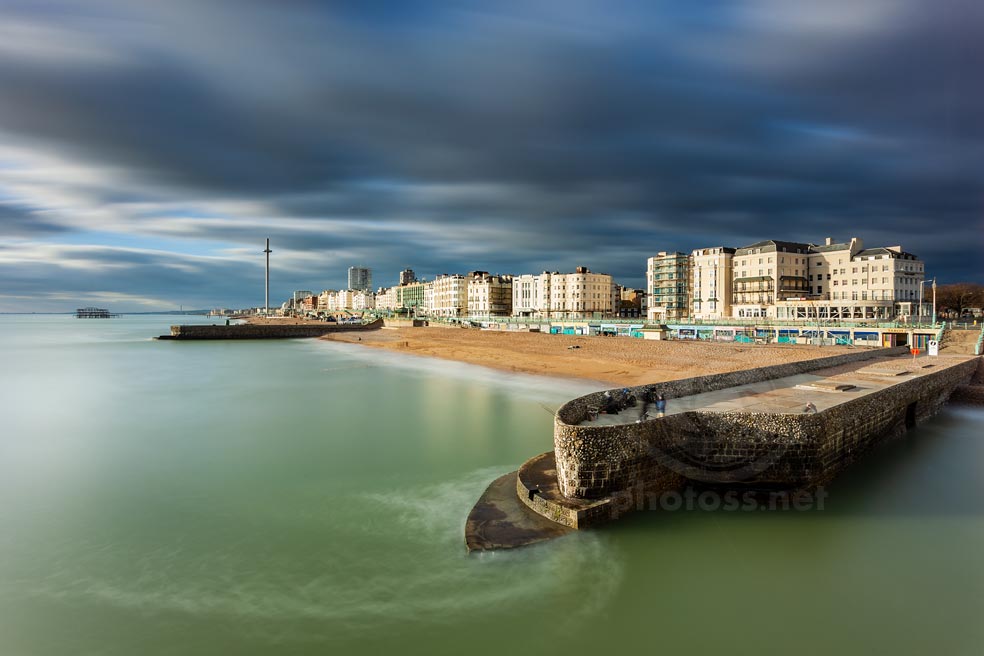
Winter afternoon on Brighton seafront
A 60-second exposure taken about 2 hours before sunset in late January. The sunlight was clearly coming from the left, and since from this vantage point you can see different sides of the buildings (fronts and sides), the resultant lighting created a “3D read” on them. That is, the interplay between faces lit to varying degrees informs the eye that it’s looking at forms in three-dimensional space. The same effect is happening on on the foreground groyne.
LIGHTING
Lighting is defined as the state of being lighted; illumination. So light and light sources are obviously a fundamental part of lighting. But in photographic parlance, there’s infinitely more behind this term than this pithy definition would suggest. It’s not only above light sources, its intensity, its colour temperature, and its angle. But also about how light operates on different objects, materials, surfaces that it hits. How it bounces between those objects and surfaces (which creates indirect illumination). And how light gets diffused or scattered by some objects, like droplets of moisture. How it affects our perception of colour. How directly lit areas work visually against shaded surfaces, how it determines the tonality of the scene.
So, I’d propose that light strictly defined is an objective and quantifiable phenomenon of the physical world. Whereas lighting, in the context of landscape photography at least (I’m aware that both words have other meanings, irrelevant to this discussion), is more about our subjective perceptions, caused or affected by light. In practice, however, photographers tend to use the word “light” as a shorthand for “lighting” and all that it entails.
MY FAVOURITE SCENARIO FOR LANDSCAPE:
MODELLING LIGHTING

Winter morning on the South Downs near Shoreham-by-Sea
The sun was low above the horizon, to the right and in front of the camera. The play of lit and shaded areas resulting from that defines or “sculpts” the main terrain features. It gives the folds an impression of volume and a three-dimensional quality. On lower level, it also brings out the textures and details. The same scene photographed in the afternoon, with the sun behind the camera, looks much flatter and lacks nuance.
If I have a choice, which isn’t very often admittedly, I most enjoy working with direct sunlight coming at a low(ish) angle, and with variable “puffy” clouds in the sky. Shapely, shifting clouds lessen the harshness of sunlight to a degree and enrich the colours in the scene. Obviously, they also provide some graphic content in the sky and thus give more wiggle room for meaningful compositions. (I’m also not a fan of hazy, murky days, and prefer to work with good air clarity)
But even if I don’t include the sky in my frame (as in abstract telephoto landscapes), those “photogenic” clouds can be immensely helpful due to how they affect the tonality and our colour perception. Cloud shadows falling on the land here and there can also enhance the illusion of depth in the scene, or create “spotlights”, even if the sun is high in the sky. Partly filtered light coming through the clouds often adds more variation and interest to the scene.

Afternoon in early spring on the South Downs near Lewes
While I clearly didn’t include the sky in this frame, the clouds floating across it helped “enhance” the tonality in this frame. Their patchy shadows created a lot more nuance and depth in the frame, and enriched the colours. Because even though the sun was to the right of the camera, it was still quite high in the sky at this time of day and created uniform and rather boring lighting on the land.
Days with such atmospheric conditions are almost invariably very fruitful photographically. They usually offer a range of opportunities for wide angle scenes, telephoto studies, and everything in between.
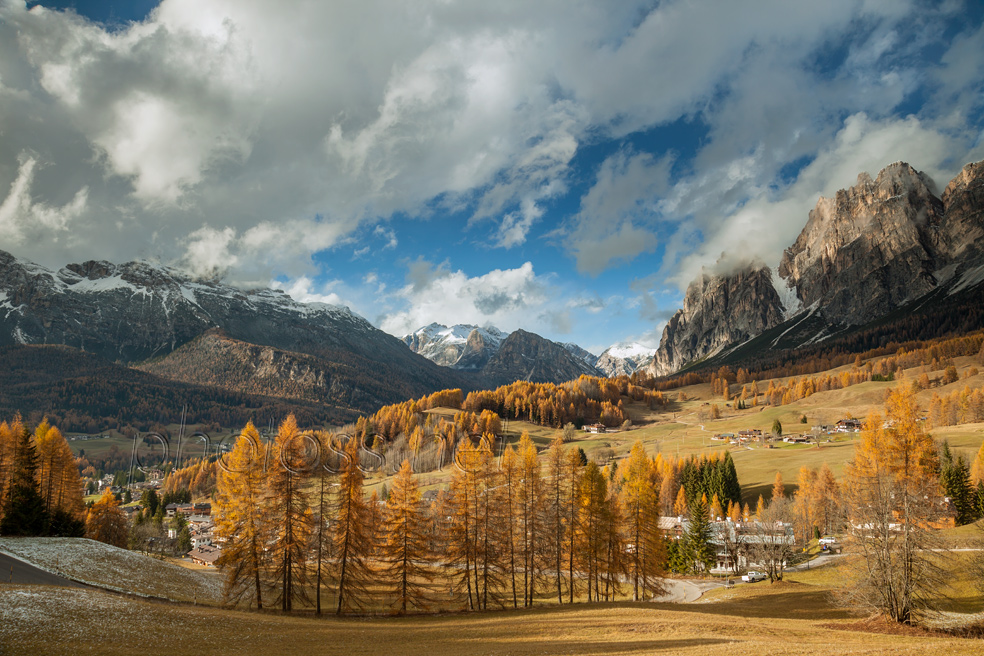
Those ideal atmospheric conditions are only one major ingredient in my “recipe”, though. The other one, equally important, is the direction of light relative to the camera. I want to be able to see both lit and shaded parts of objects in my scene at the same time. And for that to happen, I typically prefer the sunlight to come from the side. That is likely to create a “3D read” on the objects and features in my scenes. Meaning that although the photograph is really a flat surface, the interplay of lit and shaded surfaces tells the eye that it is looking at a depiction of three-dimensional forms.
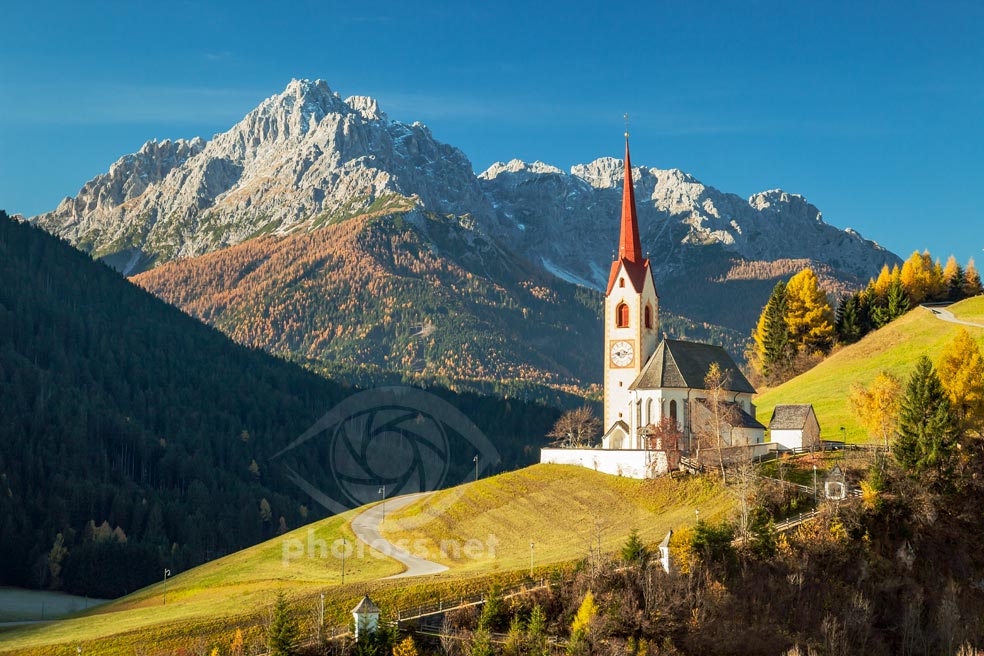
Autumn morning at Winnebach church, South Tyrol, Italy.
The sun was on my left, hitting different faces of the church at different angles. Some parts are only illuminated by reflected light, coming mostly from the sky (which was plentiful). The angle of light coupled with the fact that you can see the front and side of the church at the same time, due to my choice of vantage point, informs the eye that it’s looking at a three-dimensional structure, not a cardboard cutout.
In effect, your choice of perspective or angle of view affects the lighting you capture in the photo. If you stand with your back to the sun at point the camera straight ahead, the resulting lighting will be usually quite uniform and flat. If you change your orientation, so that the sun rays are coming from the side, you’ll be able to see the highlights, shadows and in-between areas on objects, which will give them an impression of volume and depth in the photograph. Even though it’s exactly the same moment in time, the same light and atmospheric conditions…
Naturally, often the views or potential compositions you can see when you have the sun behind you while you’re on location are more interesting. And if you look to the side, there may not be anything worthy of being photographed. The choice of perspective and vantage point, as well as anticipation and planning, effectively contribute to lighting. My personal motto is:
“Follow the light”

Sunrise on Southwick beach, West Sussex.
Industrial landscape is not really my thing. But this recent photo (taken in late January 2023) resulted from my following the maxim of “following the light”. My original plan was to photograph the sunrise over the sea. When that wasn’t feasible, because the sunlight suddenly became too intense, I looked for other potential frames to make use of the dramatic lighting that suddenly became available.
Which in practice means that even though I may have set out with some specific views or angles in mind, if I can see or anticipate more favourable lighting from a different angle or vantage point, I’ll try to get some shots from there. In such situations I will often shoot from a less obvious, even less flattering, angle on a given subject. Or turn my attention to something completely different, perhaps trivial, because the lighting creates a better spectacle and opportunity there.
Thankfully, there are numerous handy tools available that can help us plan our outings and trips (many of those tools are free to use). So that we can use our time on location more efficiently and leave less to guesswork or improvisation. The ones I’ve been using on a regular basis in my planning are: The Photographers Ephemeris, Google maps, especially its terrain view, and for UK locations Ordnance Survey maps.

Bullocks on the South Downs near Brighton.
Early May around noon. The sun was obviously quite high in the sky, but other than that this is very close to my dream lighting scenario. Sunlight coming from the right, slightly from in front of the lens, and fantastic clouds. Not only did they furnish the sky beautifully, but the reflected light they provided managed to soften even the harsh tonality of a spring midday.
My “Best Lighting Recipe”
In summation, here’s my list of ingredients that add up to the “best lighting” for landscape:
- direct sunlight coming from the side (possibly somewhat from in front or behind the camera)
- sun preferably at a low angle to the horizon
- good visibility (low haze/air pollution)
- optional, but highly desirable: puffy, shapely clouds, if you have them in your kitchen, make for a great topping and enhance the overall effect even if not included in the frame
Of course, this is formulaic, oversimplified and not quite serious. Such conditions don’t happen every day, and even if you’re lucky enough to get them, they may not work perfectly for your particular scene. But it can be a practical checklist for beginners who struggle with lighting in their photos (I was there once myself). Useful when planning outings and making decisions on location. Just like “the rule of thirds” can be useful at the beginning for those who struggle with composition (read this article for my thoughts on and approach to composition).
WHEN I DON'T GET WHAT I LIKE (IN LIGHTING)
As you no doubt know from your own experience, dear reader, “ideal” conditions only come every once in a while. Most of the time we have to make do with what’s available and… be creative. Still, I enjoy taking photos in all kinds of conditions and usually plan my trips and outings depending on what’s likely to happen, based on weather forecasts, observation and experience. Here are a few, mostly local, examples (this is by no means an exhaustive list of possible scenarios, such a list cannot possibly exist):
Contre-jour
Shooting into the light, for a silhouetted or semi-silhouetted effect. I find this approach works best if the would-be silhouette is relatively fine, not too blocky, and interestingly shaped. The West Pier ruins fit the bill perfectly. I used a 0.5-second exposure to suggest movement in the water and got the distorted reflections as a bonus.


Front lighting
Light coming from behind your back almost invariably creates flat lighting… My plan here (Hope Gap in East Sussex) was to walk towards the sun to a spot behind this place, but the tide was too high at this stage. And in the end it turned out I was only granted a few minutes of filtered sunlight, about an hour before sunset. But I was still captivated by the pastel colour harmony that this scene presented, despite the less-than-perfect lighting.
Sunrises and sunsets
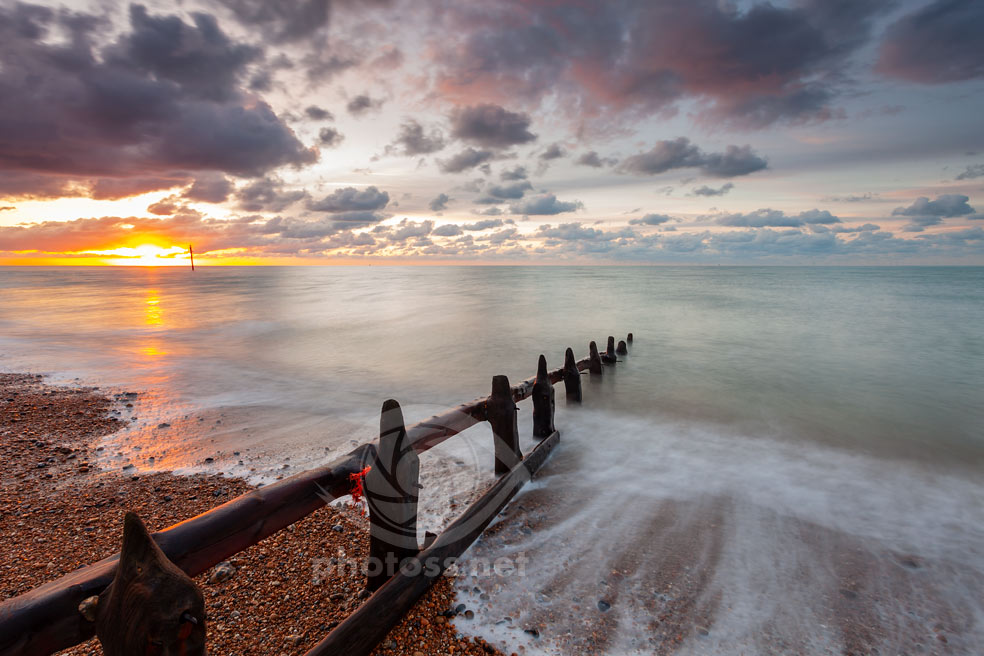
We like to point our cameras into the sun when it rises and sets. Sometimes this may mean getting a silhouetted image (but those can work at different times of day). I’m a sucker for a good sunrise or sunset as much as the next person. But for a compelling photo there must be something more that just the fact the sun is rising (or setting). In this take on Southwick beach the clouds and the colours they were catching did it for me.

Overcast and cloudy
Far from my favourite type of conditions, even on those days it’s sometimes possible to capture something interesting. Another scene from Southwick beach (my “emergency” location within a short walk from my place). I was hoping for some sunset colours here, which never materialised. But despite that deficiency, the rare low tide exposing the sand together with the billowing clouds created some opportunities… A 30-second exposure.
Fog and mist
Fog, misty, thick atmosphere can create great opportunities. Here though (at Barcombe Mills) I was once again expecting some colour at dawn and then sunrise. That never happened. The atmosphere and lack of colour created something else that I didn’t expect. A very atmospheric ethereal scene with and almost perfectly (and naturally) monochrome palette.

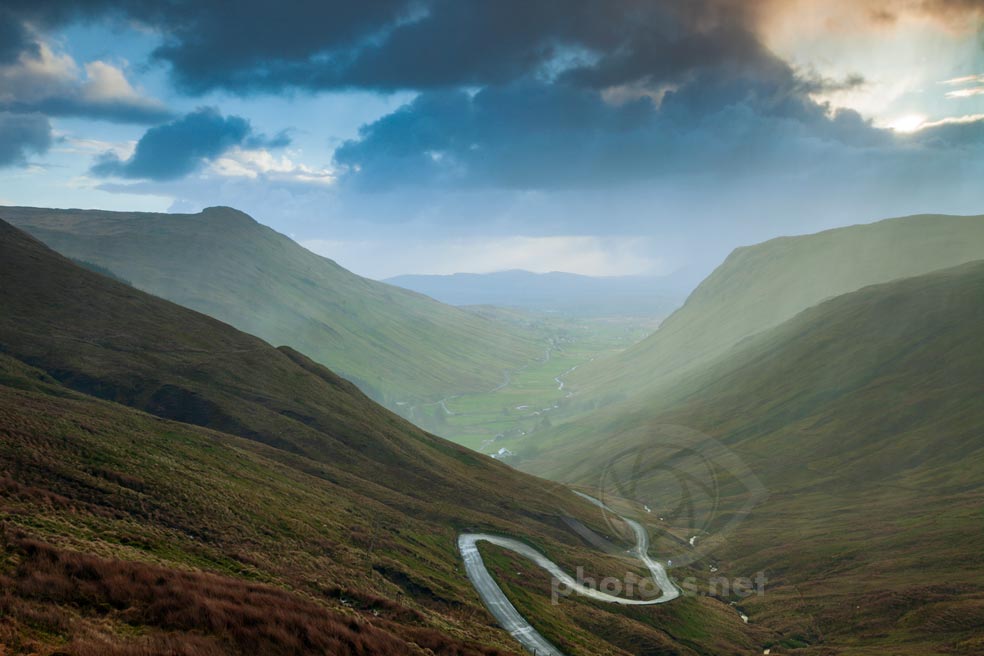
Rain
Sometimes even rain can create some worthy opportunities. I was hoping, again, for a decent sunrise here, at Glengesh Pass in country Donegal, Ireland. The sun eventually did emerge from behind the clouds, only about an hour after sunrise. But in the interim, passing showers created quite a spectacle. Although it did help that I was working with a distinctive landmark and the sky wasn’t fully overcast.
Blue Hour
If it wasn’t so short, Blue Hour would be up there with my ideal daylight scenario. Sadly, the window of opportunity typically lasts about 20 minutes or so, at least in moderate climate zones. For that reason it’s not very “versatile” and you need to be quite precise when planning for it. I have another article about what Blue Hour is and how to get the most out of it. (Picture: dusk on the riverside in York)

Thank you for reading. Check out other similar articles in my Landscape Photography is Simple “blog”. Or click on a random post below.
INTRO So, what is the best light for landscape photography?…

Great article with a lot of relevant information, beautifully illustrated – thank you!
Thank you for taking the time to read, I’m glad you enjoyed it.
I really enjoyed reading this Slawek. It’s very concise making the principles of light and lighting very easy to follow and understand. I bookmark quite a few of your articles and return to them often when I need to refresh the underlying principles of what I am trying to do. Perhaps you need to write a book !
Thank you Richard, very kind. I’m happy to hear you find value in my little essays. A book – maybe at some stage; these short pieces might come in handy then.